hershey’s triple chocolate fudge brownie mix instructions

Hershey’s Triple Chocolate Fudge Brownie Mix offers a convenient way to create rich, fudgy brownies with triple chocolate flavor. Made with chocolate chips, chunks, and dark cocoa, it delivers indulgent treats with minimal effort, perfect for satisfying any chocolate craving in about 30 minutes.

Overview of the Product

Hershey’s Triple Chocolate Fudge Brownie Mix is a convenient baking solution designed to deliver rich, fudgy brownies with a deep chocolate flavor. The mix combines chocolate chips, chunks, and dark Dutch cocoa for an indulgent treat. It requires only water, oil, and eggs, making it easy to prepare. Perfect for both novice bakers and experienced cooks, this mix ensures consistent results. The triple chocolate blend guarantees a decadent taste, while the fudge-like texture satisfies any chocolate craving. With minimal preparation time and straightforward instructions, Hershey’s Triple Chocolate Fudge Brownie Mix is ideal for quick desserts or special occasions. Its popularity stems from its ability to balance convenience with high-quality flavor, making it a favorite among chocolate lovers. Whether for family gatherings or personal indulgence, this mix promises a delicious, chocolatey experience every time.

Why Choose Hershey’s Triple Chocolate Fudge Brownie Mix?

Hershey’s Triple Chocolate Fudge Brownie Mix is a top choice for chocolate lovers seeking a rich, indulgent dessert with minimal effort. The mix combines chocolate chips, chunks, and dark Dutch cocoa, ensuring a deep, velvety chocolate flavor in every bite. Its triple chocolate blend sets it apart from other mixes, offering a decadent treat that satisfies cravings. Additionally, the mix is incredibly easy to prepare, requiring only water, oil, and eggs, making it accessible for both novice and experienced bakers. The result is a fudgy, gooey texture that many brownie enthusiasts adore. With Hershey’s reputation for quality chocolate, this mix guarantees a delicious outcome every time. Perfect for quick desserts or special occasions, it’s a convenient and tasty solution for anyone looking to create mouthwatering brownies without the hassle of measuring multiple ingredients.

Ingredients and Components

The mix includes chocolate chips, chunks, and dark Dutch cocoa for rich flavor. Additional ingredients like water, oil, and eggs are required to complete the batter.

  • Chocolate chips
  • Chocolate chunks
  • Dark Dutch cocoa

What’s Included in the Mix

Hershey’s Triple Chocolate Fudge Brownie Mix is a comprehensive baking solution designed to deliver rich, fudgy brownies with ease. The mix includes a blend of high-quality chocolate chips, chocolate chunks, and dark Dutch cocoa powder, ensuring a deep, indulgent chocolate flavor. These components work together to create a moist and decadent texture that chocolate lovers will adore. Additionally, the mix is pre-measured and pre-mixed, saving time and effort in the kitchen. With these ingredients, you can achieve professional-tasting brownies without the hassle of sourcing multiple chocolate varieties. The mix also includes all the necessary dry ingredients, such as flour and sugar, to simplify the baking process. By combining these elements, Hershey’s Triple Chocolate Fudge Brownie Mix provides everything needed to make delicious, triple-layered chocolate brownies at home.

Additional Ingredients Required

To prepare Hershey’s Triple Chocolate Fudge Brownie Mix, you’ll need a few simple ingredients beyond the mix itself. These include water, eggs, and oil, which are essential for achieving the right consistency and moisture in the brownies. The mix is designed to be straightforward, requiring minimal additional components to ensure ease of preparation. While the mix already contains chocolate chips, chunks, and dark cocoa, you may also choose to add optional mix-ins like nuts, dried fruit, or even candy pieces to enhance the flavor and texture. These additions can personalize the brownies to your taste preferences. Ensure all ingredients are fresh and of good quality to guarantee the best results. By keeping the additional ingredients simple, the mix allows for both convenience and creativity in the baking process.

Preparation Instructions

Preheat oven to 350°F. Combine mix, water, oil, and eggs in a bowl, stirring until well-mixed. Pour batter into a greased pan and bake for 25-35 minutes, until edges pull away from the pan.

Step-by-Step Mixing Process

  1. Preheat your oven to 350°F (175°C) before starting the mixing process.
  2. In a large mixing bowl, combine the Hershey’s Triple Chocolate Fudge Brownie Mix with 1 cup of water, 1/3 cup of vegetable oil, and 2 large eggs. Mix these ingredients together until well combined.
  3. Stir the batter with a spoon or electric mixer on low speed until the ingredients are fully incorporated. Be careful not to overmix, as this can lead to dense brownies.
  4. Stop mixing once the batter is smooth and free of lumps. If using, gently fold in any additional mix-ins like nuts or chocolate chips.
  5. Pour the batter into a greased 13×9-inch baking pan, spreading it evenly to ensure uniform cooking.
  6. Use a spatula to scrape the sides and bottom of the bowl to ensure no batter is wasted.

This process ensures a smooth, consistent batter ready for baking.

Pan Preparation and Baking

Preheat your oven to 350°F (175°C). Grease an 8-inch or 9-inch square baking pan or line it with parchment paper for easy removal. Pour the prepared brownie batter evenly into the pan, smoothing the top with a spatula. For a 13x9x2-inch pan, bake for 30-35 minutes, while 8- or 9-inch pans require 20-22 minutes. Start checking for doneness 2-3 minutes before the recommended time to avoid overcooking. The brownies are ready when a toothpick inserted 2 inches from the center comes out with a few moist crumbs. Let them cool slightly before cutting. Avoid overbaking to ensure a fudgy texture. If using mix-ins like nuts or chocolate chips, distribute them evenly before baking for the best results.

Baking Time and Temperature Guidelines

For optimal results, bake Hershey’s Triple Chocolate Fudge Brownie Mix at 350°F (175°C). The baking time varies depending on the pan size. For a 13x9x2-inch pan, bake for 30 to 35 minutes, while 8-inch or 9-inch pans require 20 to 22 minutes. Start checking for doneness after the minimum recommended time by inserting a toothpick into the center. If it comes out with a few moist crumbs, the brownies are ready. Avoid overbaking to ensure a fudgy texture. Let the brownies cool slightly in the pan before cutting. Always preheat the oven and ensure it’s at the correct temperature for even baking. Adjust baking time if using a convection oven, reducing it by about 5 minutes. Proper timing ensures the brownies are gooey, rich, and perfectly indulgent, delivering the signature triple chocolate experience.

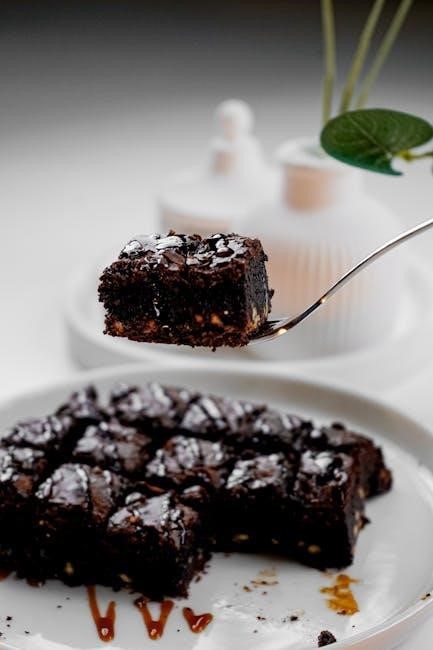
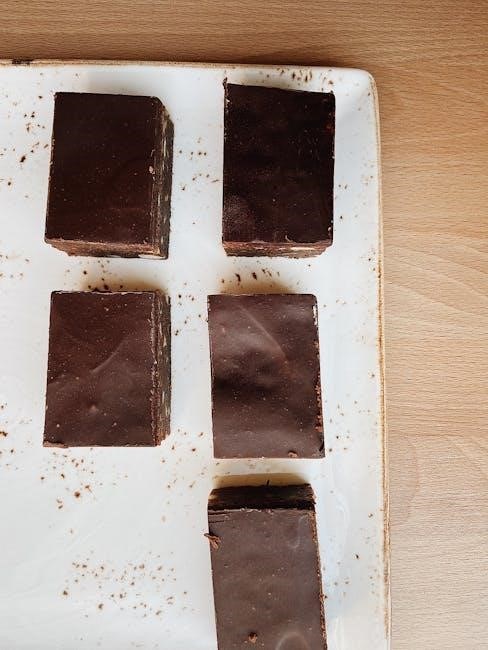
Cooling and Cutting Instructions

After baking, allow the brownies to cool completely in the pan on a wire rack. This step is crucial for achieving the perfect fudgy texture. Avoid cutting while the brownies are still warm, as they may crumble or break unevenly. Once cooled, use a sharp knife to cut the brownies into desired portions. For clean, straight cuts, wipe the knife with a paper towel between slices. If the brownies stick to the knife, lightly dampen it with water or dip it in hot water and dry before cutting. Cutting when the brownies are completely cool ensures neat, even pieces. For the best results, let the brownies rest for at least 30 minutes after baking before slicing. Patience will reward you with perfectly fudgy, chocolatey brownies that are easy to serve and enjoy.

Baking Tips and Tricks

For the perfect fudgy texture, avoid overmixing the batter and don’t overbake. Use room-temperature ingredients and grease the pan properly. Let brownies cool slightly before cutting for clean, even slices.

Ensuring Fudgy Texture

Achieving the perfect fudgy texture in Hershey’s Triple Chocolate Fudge Brownie Mix requires attention to a few key details. First, avoid overbaking, as this can dry out the brownies and make them cakey. Remove them from the oven when the edges are set but the center still appears slightly undercooked. Second, use high-quality chocolate ingredients, as the mix already includes chocolate chips, chunks, and dark cocoa for rich flavor. Third, don’t overmix the batter, as this can develop excess gluten, leading to a denser texture. Finally, consider adding a touch of extra water or using room-temperature eggs to enhance moisture. By following these tips, you’ll achieve a gooey, indulgent fudgy texture that’s sure to impress. Proper baking time and temperature are also crucial, so keep an eye on the brownies during the final minutes of baking.

Common Mistakes to Avoid

When preparing Hershey’s Triple Chocolate Fudge Brownie Mix, there are a few common mistakes to avoid for the best results. Overmixing the batter can lead to dense, tough brownies instead of a fudgy texture. Ensure to mix wet and dry ingredients separately and fold them gently. Another mistake is incorrect pan preparation; failing to grease the pan properly can cause the brownies to stick and break apart when cutting. Additionally, using the wrong baking temperature or time can result in undercooked or overcooked brownies. Overcooking is a frequent error, as it strips the brownies of their moisture and richness. Lastly, cutting the brownies too soon after baking can cause them to crumble or lose their shape. Allowing them to cool completely in the pan before slicing is essential for clean, even cuts and a professional finish.

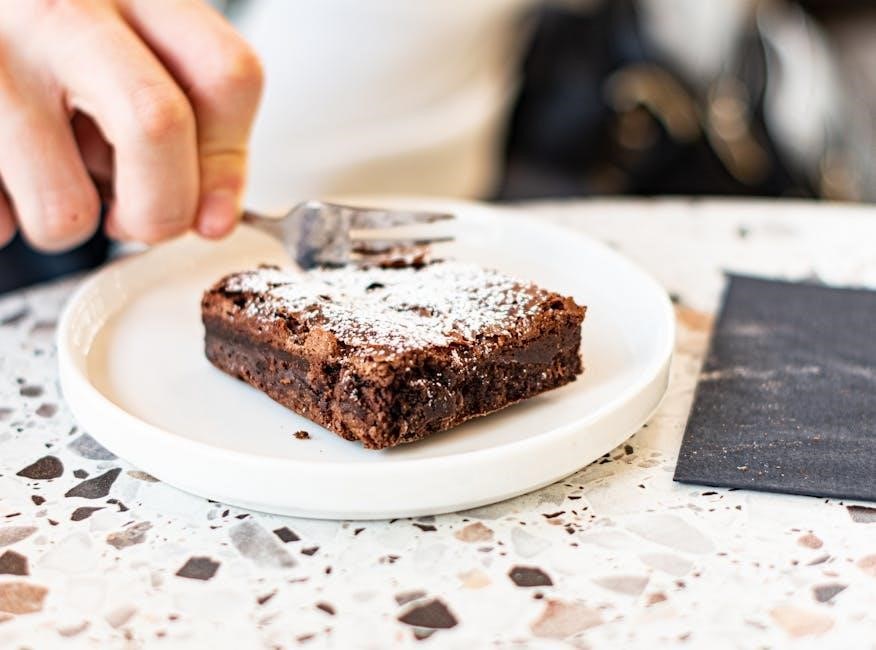
Taste and Texture Profile

Hershey’s Triple Chocolate Fudge Brownie Mix delivers a rich, indulgent chocolate experience with a fudgy, gooey texture. The blend of milk and dark chocolate creates a deep, velvety flavor, enhanced by chocolate chips and chunks for added decadence.

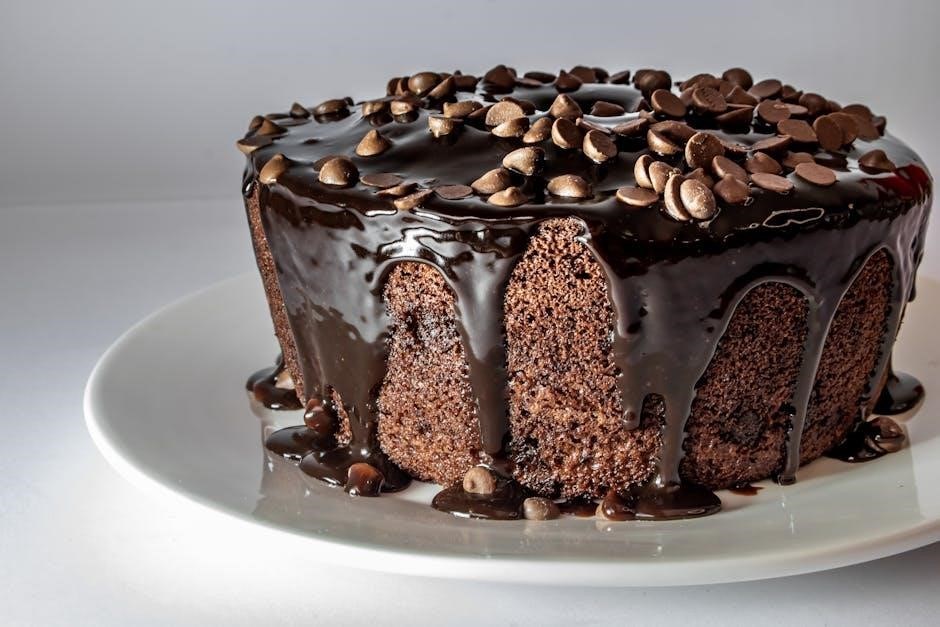
Richness of Chocolate Flavors

Hershey’s Triple Chocolate Fudge Brownie Mix is renowned for its deep, indulgent chocolate profile, achieved through a blend of chocolate chips, chunks, and dark Dutch cocoa. The mix combines milk chocolate for creaminess, semi-sweet chocolate for balance, and dark cocoa for a bold, intense flavor. This triple-layered chocolate experience ensures a rich, fudgy texture that satisfies any chocolate craving. The dark cocoa adds a sophisticated note, while the chocolate chips and chunks provide bursts of melty goodness in every bite. The result is a treat that feels decadent and satisfying, with a flavor profile that appeals to both casual bakers and chocolate enthusiasts. The mix’s ability to deliver such a complex and indulgent taste with minimal effort makes it a standout choice for homemade brownies.

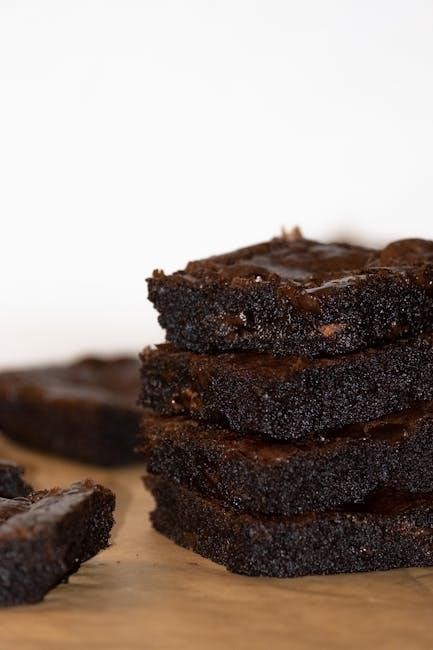
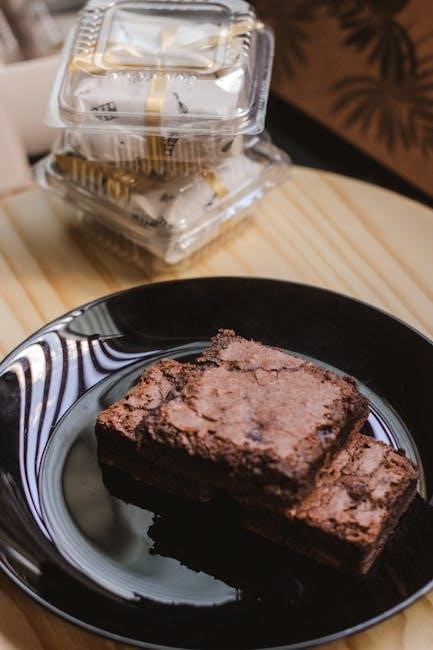
Expectations from the Final Product

When using Hershey’s Triple Chocolate Fudge Brownie Mix, you can expect a rich, indulgent dessert with a fudgy texture and deep chocolate flavors. The mix combines chocolate chips, chunks, and dark cocoa, ensuring a decadent taste experience. The brownies will have a gooey center and a slightly firm edge, perfect for satisfying chocolate cravings. With proper preparation, the final product will be moist and loaded with chocolatey goodness, offering a treat that feels homemade despite the mix’s convenience. The triple chocolate elements create a layered flavor profile, from the sweetness of milk chocolate to the depth of dark cocoa. Expect a dessert that impresses both in taste and appearance, ideal for sharing or enjoying as a personal indulgence. The mix’s consistency ensures reliable results, making it a go-to for chocolate lovers seeking a hassle-free baking experience.

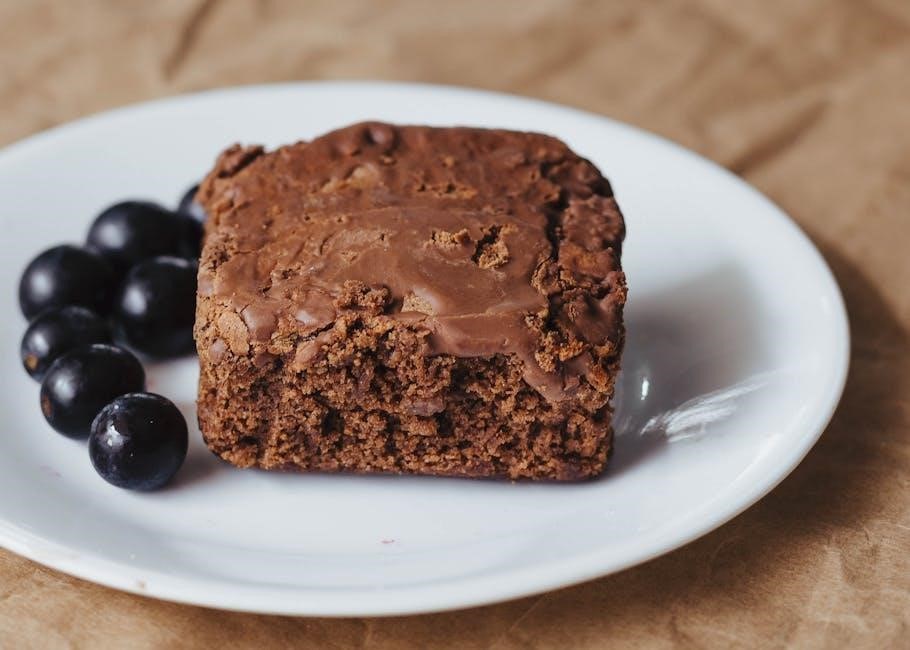
Customization and Variations

Enhance your brownies by adding nuts, caramel bits, or espresso powder. Experiment with different chocolate types or mix in marshmallows for unique twists, creating a personalized treat that suits your taste preferences perfectly.

Adding Nuts or Other Mix-Ins

Enhance your Hershey’s Triple Chocolate Fudge Brownies by incorporating nuts or other mix-ins for added texture and flavor. Walnuts, pecans, or hazelnuts are popular choices, providing a satisfying crunch that complements the fudgy chocolate base. For a sweeter twist, try adding dried cranberries, cherries, or even candy pieces like M&M’s or chopped peanut butter cups. Fold these ingredients gently into the batter after mixing to ensure even distribution without overmixing. A general rule is to use about 1 cup of mix-ins per batch, but feel free to adjust based on preference. This step allows for endless customization, making each batch unique and tailored to your taste. Experiment with combinations like sea salt, espresso powder, or even a sprinkle of cinnamon for a bold twist. Remember, the mix-ins should enhance, not overpower, the rich chocolate flavor. Let your creativity shine and enjoy the perfect balance of textures and tastes in every bite.

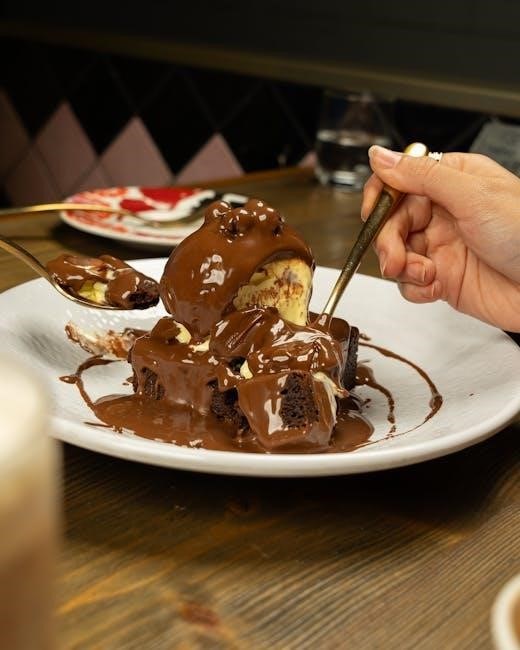
Using Different Types of Chocolate

While Hershey’s Triple Chocolate Fudge Brownie Mix already includes a blend of chocolate chips, chunks, and dark cocoa, experimenting with different types of chocolate can elevate the flavor profile. For a deeper, richer taste, consider adding dark chocolate with a higher cocoa percentage. Milk chocolate can be incorporated for a sweeter, creamier texture. White chocolate adds a unique, velvety contrast to the boldness of the brownies. Additionally, mixing in chopped chocolate bars or chocolate shavings can enhance the overall chocolate experience. For an extra indulgent touch, Hershey’s Kisses or other chocolate drops can be folded into the batter before baking. These variations allow bakers to customize the brownies to their taste preferences, creating a truly personalized dessert. The key is to balance the added chocolates with the existing mix to maintain the fudgy texture and avoid overpowering the other ingredients.

Storage and Shelf Life

Store the mix in a cool, dry place to maintain freshness. The unopened mix typically has a shelf life of up to 12 months. Baked brownies should be stored in an airtight container at room temperature or refrigerated for up to 5 days.

Proper Storage Conditions

To maintain the quality and freshness of Hershey’s Triple Chocolate Fudge Brownie Mix, store it in a cool, dry place away from direct sunlight and moisture. Ensure the pouch is tightly sealed after opening to prevent exposure to air, which can cause the chocolate components to lose flavor or texture. For baked brownies, store them in an airtight container at room temperature for up to 3 days or refrigerate for up to 5 days. Freezing is also an option for longer storage—place the brownies in a freezer-safe container or zip-top bag and thaw at room temperature when ready to serve. Proper storage helps preserve the rich, fudgy texture and intense chocolate flavor that this mix is known for. Always check the expiration date on the packaging and use the mix within a reasonable time frame for the best results.

Reviews and Ratings

Consumers praise Hershey’s Triple Chocolate Fudge Brownie Mix for its rich, fudgy texture and deep chocolate flavor. Reviewers highlight its ease of preparation and indulgent taste, though some note it can be pricey.

Consumer Feedback and Testimonials

Consumers rave about Hershey’s Triple Chocolate Fudge Brownie Mix, praising its ease of use and rich, indulgent flavor. Many highlight the mix’s ability to deliver fudgy, chocolatey brownies with minimal effort. Reviewers often mention the convenience of adding just water, oil, and eggs, making it a go-to for both novice bakers and busy households. The triple chocolate components—chips, chunks, and dark cocoa—receive consistent praise for creating a deep, satisfying taste. Some users note the brownies bake perfectly in 30-35 minutes for a 13×9 pan, while others appreciate the option to customize with nuts or additional mix-ins. A few reviewers mention the brownies can be overly sweet, but overall, the product is well-loved for its consistency and flavor. Tami Dunn’s YouTube review, with over 20K views, further underscores its popularity, calling it a top choice for chocolate lovers seeking a hassle-free baking experience.

Expert Reviews and Comparisons

Expert reviews highlight Hershey’s Triple Chocolate Fudge Brownie Mix as a top choice for chocolate lovers. Chefs and bakers praise its rich, indulgent flavor profile, achieved through a blend of chocolate chips, chunks, and dark cocoa. Many compare it favorably to homemade recipes, noting its convenience without compromising taste. Tami Dunn, in a detailed YouTube review, rated it highly for its fudgy texture and ease of preparation. Similarly, Betty Crocker’s review emphasized its versatility and the satisfaction of achieving professional-quality brownies at home. Experts often recommend it for those seeking a quick yet decadent dessert. While some compare it to other mixes, Hershey’s stands out for its triple chocolate layers, offering a depth of flavor that rivals premium brands. Overall, it’s a crowd-pleaser, ideal for both novice bakers and experienced cooks looking for a reliable mix.

Troubleshooting Common Issues

Solving Overcooked or Undercooked Brownies

Adjust baking time and temperature to prevent overcooking. Ensure the center is set for fudgy texture. Use a toothpick to check doneness, and avoid opening the oven too early.

Addressing Mix-In Distribution Problems

Gently fold mix-ins into the batter to avoid uneven distribution. Use the recommended pan size and smooth the batter evenly for consistent results and a professional finish.

Overcooked or undercooked brownies can be frustrating, but there are easy fixes to achieve the perfect texture. If your brownies are overcooked, they may appear dry and crumbly. To salvage them, try glazing with melted chocolate or adding a drizzle of caramel to enhance moisture. For undercooked brownies, which may feel too gooey, bake for an additional 2-3 minutes and check with a toothpick until it comes out with a few moist crumbs. Ensure accurate oven temperature using a thermometer, as incorrect heat can lead to uneven cooking. Avoid opening the oven too early, as this can cause the brownies to sink. Always check doneness by gently inserting a toothpick into the center; it should emerge with a few fudgy crumbs for the ideal texture. Proper pan preparation and adherence to baking times will help you achieve perfectly cooked, fudgy brownies every time.

Ensuring even distribution of mix-ins like chocolate chips or nuts is crucial for the perfect brownie. To avoid uneven distribution, gently fold mix-ins into the batter until they are evenly dispersed. Overmixing can cause mix-ins to sink or clump together, so mix just until combined. For larger mix-ins like nuts or chocolate chunks, layer them in the batter before baking. Spread half the batter in the pan, add mix-ins, then top with the remaining batter. This ensures a balanced distribution. If mix-ins tend to rise to the surface, lightly press them into the batter after pouring it into the pan. Avoid overbaking, as this can cause mix-ins to become overly concentrated in certain areas. Proper pan size and even spreading of the batter also help prevent distribution issues, ensuring every bite is packed with flavor and texture. Regularly check the batter consistency and adjust mixing techniques as needed for optimal results.

Hershey’s Triple Chocolate Fudge Brownie Mix is a delightful solution for chocolate lovers seeking a quick and indulgent treat. With its rich blend of chocolate chips, chunks, and dark cocoa, it ensures a decadent flavor profile. The mix simplifies baking, requiring just a few additional ingredients like water, eggs, and oil. Perfect for both beginners and experienced bakers, it delivers fudgy, chocolatey brownies in about 30 minutes. The convenience and consistency of the mix make it a great choice for satisfying cravings or impressing guests. Whether you’re baking for a family gathering or a cozy night in, Hershey’s Triple Chocolate Fudge Brownie Mix promises a deliciously satisfying experience. Its ease of use and mouthwatering results make it a must-try for anyone who adores chocolate and baking.

presto flipside waffle maker instructions

The Presto Flipside Belgian waffle maker is a unique appliance designed to create extra-thick, crispy waffles․ Its rotating design ensures even batter distribution, while a dual-function base provides convenient storage․

Overview of the Presto Flipside Belgian Waffle Maker

The Presto Flipside Belgian waffle maker distinguishes itself with a unique, space-saving design and professional-style rotating feature․ This appliance is engineered to bake extra-thick Belgian waffles with a crispy exterior and a fluffy interior in just minutes․ The 180-degree flipping action evenly spreads the batter across the grids, ensuring consistent results every time․ Its compact footprint is achieved through a dual-function base that enables convenient rotation during cooking and locks the unit in a vertical position for easy storage․ The device is designed for ease of use, allowing for quick and efficient waffle production․ The Presto Flipside waffle maker’s design stands out from more traditional models, offering a distinct approach to waffle making with its innovative flipping mechanism and storage solution, making it an ideal choice for those seeking a more modern and convenient waffle-making experience․ It has a sleek design and user-friendly functionality, catering to both beginner and experienced waffle makers alike․

Key Features and Design

The Presto Flipside boasts a rotating design for even baking and a dual-function base for compact storage․ It’s designed to create thick, crispy waffles with fluffy insides, standing out from traditional waffle makers․

Rotating Design for Even Baking

The Presto Flipside waffle maker’s standout feature is its professional-style rotating design․ This 180-degree flip capability is not just a gimmick; it’s a functional element crucial for achieving evenly baked waffles․ When the batter is poured onto the lower grid, flipping the unit distributes it uniformly across the entire cooking surface․ This ensures that the batter reaches all corners and edges, resulting in a waffle that is consistently thick and golden-brown․ The rotating action eliminates the problem of uneven cooking, where some parts of the waffle might be undercooked while others are overdone․ This innovative design promotes the creation of waffles with a perfect balance of a crispy exterior and a soft, fluffy interior․ The rotation also helps to prevent batter from settling unevenly․ The flipping action is smooth and easy to perform, thanks to the well-engineered base․ It is a unique feature that sets this waffle maker apart from the rest of the market․

Dual Function Base for Storage

The Presto Flipside waffle maker is designed with a unique dual-function base that serves two primary purposes, the first being convenient rotation during the baking process․ This base allows the waffle maker to flip 180 degrees effortlessly, ensuring even batter distribution and consistent cooking․ Secondly, this innovative base also allows for compact vertical storage․ When not in use, the waffle maker can be locked into an upright position, minimizing its footprint and saving valuable counter or cabinet space․ This is particularly beneficial for those with smaller kitchens or limited storage areas․ The base is stable and sturdy, preventing the waffle maker from tipping over when stored vertically․ The locking mechanism is simple and effective, ensuring the unit stays securely in place․ The dual-function base highlights Presto’s commitment to both functionality and practical design․ It is a clever feature that enhances the user experience while optimizing storage solutions․

Operating Instructions

To operate the Presto Flipside, begin by preheating the waffle maker․ Then, prepare your batter and pour it onto the grid․ Flip the unit and bake until golden brown․

Preheating the Waffle Maker

Before you begin making delicious Belgian waffles, it is crucial to properly preheat your Presto Flipside waffle maker․ Begin by placing the appliance on a flat, stable surface, ensuring the digital display is facing you․ Plug the AC cord into a power outlet; the signal light will then illuminate, indicating that the unit is in the process of heating up․ The waffle maker should be preheated in the closed position․ Allow sufficient time for the appliance to reach the optimal temperature; this process usually takes a few minutes․ Do not attempt to open the waffle maker before the preheating process is complete․ Once the unit is preheated, the signal light may change or turn off, depending on your model, indicating it’s ready to use․ This step is essential for achieving the desired texture and even cooking of your waffles, ensuring they are perfectly crispy on the outside and fluffy on the inside․ Proper preheating also prevents batter from sticking to the grids․

Batter Preparation and Usage

For optimal results with your Presto Flipside waffle maker, proper batter preparation is key․ Begin by combining your dry ingredients, such as flour, sugar, baking powder, and salt, in a large bowl․ In a separate bowl, whisk together your wet ingredients, including milk, eggs, and oil․ Gradually pour the wet mixture into the dry ingredients, whisking gently until just combined․ Avoid overmixing, as this can lead to tough waffles․ Once your batter is ready, carefully pour approximately one cup onto the center of the bottom grid of the preheated waffle maker․ Ensure that the batter is evenly distributed․ Close the top grid and immediately flip the waffle maker 180 degrees․ This rotation will help evenly distribute the batter across the entire cooking surface․ It is important to follow these batter preparation and usage instructions to ensure delicious waffles․

Baking Time and Adjustments

The standard baking time for the Presto Flipside waffle maker is approximately four minutes per waffle, however, this can be adjusted to your personal preference․ You will know when the waffle is ready when it has a golden-brown color and is crisp on the outside․ The exact baking time may vary slightly depending on the specific batter you’re using and your desired level of crispness․ If you prefer a lighter waffle, consider reducing the baking time by a minute or two; For a darker, crispier waffle, extend the baking time slightly․ Monitor the waffle’s progress during cooking and make adjustments as needed․ Always be sure to follow the instructions carefully․ Remember to unplug the waffle maker when done cooking․

Care and Maintenance

Proper care ensures the longevity of your Presto Flipside waffle maker․ Always unplug the unit and allow it to cool completely before cleaning․ Avoid immersing it in water, and never use abrasive cleaners․

Cleaning Procedures

To maintain your Presto Flipside Belgian waffle maker, it’s crucial to follow proper cleaning procedures․ First and foremost, always ensure the waffle maker is unplugged from the power outlet and has completely cooled down before you begin any cleaning process․ Never immerse the unit in water or any other liquid, and avoid placing it in a dishwasher, as this could cause damage to the electrical components․ To clean the waffle grids, start by brushing off any loose crumbs using a soft brush or a dry paper towel․ For more stubborn residue, you can gently wipe the grids with a damp cloth or paper towel․ Avoid using steel wool scouring pads or abrasive kitchen cleaners, as they can scratch or damage the non-stick surface․ If necessary, a mild detergent can be used on a damp cloth․ Ensure that no soapy residue remains after cleaning․ Once cleaned, allow the grids to air dry completely before storing the waffle maker․ Regular cleaning will help maintain optimal performance and ensure your waffle maker lasts longer․

Storage Guidelines

Proper storage of your Presto Flipside Belgian waffle maker is essential for preserving its condition and ensuring it’s ready for future use․ Before storing, always make sure that the waffle maker is completely cool and clean, following the cleaning procedures outlined previously․ The unique dual-function base of the Presto Flipside allows for convenient vertical storage․ This feature helps save space in your kitchen cabinets or pantry․ To store, ensure the waffle maker is locked in the upright position using the base mechanism․ Avoid placing heavy items on top of the waffle maker during storage to prevent any damage to the grids or the housing․ Keep the waffle maker in a dry area to prevent any moisture build-up, which could lead to corrosion or electrical issues․ It is also recommended to store the power cord neatly, either by loosely coiling it or using a cable tie, to avoid tangling and damage․ Following these storage guidelines will help ensure your waffle maker is ready for use whenever you crave delicious Belgian waffles․

Additional Information

For any issues, contact Presto Customer Service․ Manuals and recipes can be found online for the Presto Flipside․ Troubleshooting tips may also be available on their website, ensuring optimal use․

Troubleshooting and Support

If you encounter issues with your Presto Flipside Belgian waffle maker, several resources are available to assist you․ Firstly, consult the instruction manual provided with the unit; it often contains solutions to common problems․ If the waffle maker is not heating properly, ensure it is correctly plugged into a functioning power outlet․ Check that the signal light is glowing which indicates preheating․ If waffles are sticking, try adjusting the amount of oil in your batter or ensuring the grids are clean․ For any additional support, you can reach Presto Customer Service by phone during their operating hours․ You can also explore their website for troubleshooting guides and FAQs, or explore online forums where other users may have encountered and solved similar issues․ Remember, do not use abrasive cleaners on the unit․

Where to Find Manuals and Recipes

Locating the manual for your Presto Flipside Belgian waffle maker is straightforward․ You can often find a PDF version available for download on the manufacturer’s website, typically in the support or product section․ If you prefer a physical copy, you may be able to order a printed manual through the website as well․ Many online retailers that sell the waffle maker may also provide a link to the manual on their product page․ For recipes, the included instruction manual might have some basic recipes to start with, but many other options can be found on various cooking websites․ Look for recipes specifically designed for Belgian waffles, or explore online communities dedicated to waffle making for more ideas․ These resources can help you to create the most delicious waffles․

lycoming service instruction no. 1042

Lycoming Service Instruction No. 1042⁚ An Overview

Lycoming Service Instruction No. 1042 is a critical document providing guidance on approved spark plugs for all Lycoming piston aircraft engines. It outlines specific spark plug models and types suitable for various Lycoming engines. This instruction has undergone revisions to incorporate new engine models and updated guidelines for spark plug usage.

Purpose of Service Instruction 1042

The primary purpose of Lycoming Service Instruction No. 1042 is to provide a definitive list of approved spark plugs for all Lycoming piston aircraft engines. This document is essential for ensuring engine safety and optimal performance by guiding maintenance personnel in selecting the correct spark plugs for specific engine models. It aims to prevent the use of unapproved plugs that could lead to severe engine damage or operational issues. The instruction emphasizes that only spark plugs listed as approved by Lycoming should be installed in their engines. Furthermore, it details the importance of using the correct spark plug reach, distinguishing between short and long reach plugs and their designated engine applications. The document is periodically updated to reflect new engine models and to refine guidelines based on ongoing research and testing. By adhering to this service instruction, users can avoid potential engine malfunctions resulting from improper spark plug selection and also provides guidance on proper installation and maintenance practices related to spark plugs. This guidance includes not only the selection of spark plugs, but also the correct procedures for their installation and maintenance. The document also prevents the misuse of anti-seize compounds, stressing the importance of using copper based anti-seize rather than graphite based products.

Approved Spark Plugs Listing

Lycoming Service Instruction No. 1042 provides a detailed listing of approved spark plugs for all of their piston aircraft engines. This listing is not merely a catalog but a crucial guide that specifies which spark plugs are deemed safe and suitable for specific engine models. The document meticulously categorizes spark plugs by type, including both short-reach and long-reach variants, ensuring that mechanics and aircraft owners can easily identify the correct plugs for their particular engine. The approved list includes specific part numbers and manufacturers, such as Champion, Auburn and Unison, eliminating any ambiguity about which spark plugs to use. The listing is regularly updated to include new spark plug models and to accommodate the introduction of new Lycoming engine models, reflecting the company’s commitment to ongoing product improvement and safety. This comprehensive approach ensures that all users have access to the most current information. It helps prevent the use of incorrect spark plugs, which can lead to severe engine damage, reduced performance, and potential safety hazards, while promoting consistency and reliability in engine maintenance. It stresses that only the plugs listed as approved be used in Lycoming engines. The document also includes information on spark plug heat ranges and other important specifications to guide technicians in making the right choices for their specific needs. By adhering to the approved list, users can be assured they are using parts that are thoroughly tested and approved.

Revisions and Updates to SI 1042

Lycoming Service Instruction No. 1042 is not a static document; it undergoes periodic revisions and updates to reflect new engine models, spark plug technologies, and improved maintenance practices. These updates are crucial for ensuring that the information provided remains accurate and relevant. Each revision is typically marked with a new suffix to the document number, such as 1042AA, 1042AH, and so on, making it easy to track the changes over time. The reasons for these revisions vary but often include adding new engine models to the approved spark plug listing. For example, the inclusion of the IO-390-D engine model in Tables 4 and 5 of the document led to a specific revision. These updates also incorporate changes in spark plug specifications, manufacturing standards, and best practices for installation and maintenance. Lycoming emphasizes the importance of consulting the latest revision of Service Instruction No. 1042 before performing any maintenance or replacement of spark plugs. The revisions are FAA (DER)-approved, which means they have undergone stringent assessment. The process of updating the document ensures that all information is consistent with the latest safety regulations and industry standards, providing reliable guidelines for the safe operation of Lycoming engines. These periodic updates are essential for maintaining the integrity and reliability of the engines, as well as to avoid damage due to the use of non-approved parts.

Engine Model Applicability

Lycoming Service Instruction No. 1042 applies to all Lycoming piston aircraft engines, encompassing a wide range of models. This broad applicability is one of the reasons why it is so essential for aircraft maintenance personnel. The document provides specific spark plug recommendations tailored to different engine types, ensuring that the correct plugs are used for each model to maintain optimal engine performance and safety. The detailed tables within the service instruction list each engine model and the corresponding approved spark plugs, making it easy to find the right match. The continual revisions to Service Instruction No. 1042 ensure that new engine models are promptly included in the document, such as the addition of the IO-390-D engine to Tables 4 and 5. It’s essential to consult the latest version of the document before any maintenance to identify the correct spark plugs for your specific engine. Failure to do so could lead to using an incompatible spark plug, potentially resulting in severe engine damage. By clearly outlining which spark plugs are applicable to each engine model, Lycoming provides a robust framework for maintaining its engines, promoting both safety and the reliability of its products. The comprehensive nature of Service Instruction No; 1042 ensures that all users have access to the necessary information to keep their Lycoming engines running smoothly and safely.

Spark Plug Types⁚ Short and Long Reach

Lycoming Service Instruction No. 1042 clearly distinguishes between short reach and long reach spark plugs, emphasizing the importance of using the correct type for each engine model. Short reach spark plugs, often depicted in Figure 1 of the document, are designed for specific engine cylinder head configurations. These plugs have a shorter threaded section and are typically used in lower-horsepower engines. Conversely, long reach spark plugs, illustrated in Figure 2, feature a longer threaded portion and are required for other engine models, particularly those with higher horsepower ratings. Using the wrong reach plug can lead to severe engine damage. The service instruction provides detailed tables that list approved spark plugs by engine model, specifying whether a short or long reach plug is required. The distinction between these two types is critical, as using a long reach plug in an engine designed for a short reach plug will result in the electrode protruding too far into the combustion chamber, which can cause piston damage. Similarly, using a short reach plug where a long reach plug is needed will cause poor ignition. Therefore, careful adherence to the guidelines in Service Instruction No. 1042 is essential for ensuring safe and efficient engine operation. Lycoming’s specification of short and long reach plugs guarantees engine integrity and performance when the correct type is installed.

Anti-Seize Compound Recommendations

Lycoming Service Instruction No. 1042 provides specific guidance on the use of anti-seize compounds during spark plug installation, emphasizing that not all compounds are suitable for use in Lycoming engines. The document explicitly advises against using graphite-based anti-seize compounds, highlighting the potential for adverse effects on engine performance and spark plug function. Instead, Lycoming mandates the use of a copper-based anti-seize compound, or, alternatively, engine oil, for lubricating spark plug threads. The application of this compound or oil should begin two full threads from the electrode end of the spark plug. This precaution is vital for preventing the compound from interfering with the electrical contact and also ensures proper sealing of the spark plug in the cylinder head. The reasoning behind the prohibition of graphite-based compounds is not fully elucidated in the provided text, but it is clear that Lycoming has determined copper-based compounds to be the safer and more effective option for their engines. Proper use of the recommended anti-seize compound or oil will facilitate the correct tightening of the spark plugs and also help ensure smooth removal during maintenance. By adhering to this guidance, technicians and aircraft owners can avoid potential issues associated with incorrect compound usage, thereby ensuring the reliability and longevity of the spark plugs and the engine itself.

Spark Plug Inspection and Maintenance

Lycoming Service Instruction No. 1042 emphasizes the importance of regular spark plug inspection and maintenance for ensuring optimal engine performance and reliability. This includes periodic checks for proper installation, ensuring that the correct type of spark plug is fitted for the specific engine model, and that the plugs are correctly torqued. The document also recommends rotating top and bottom spark plugs every 25 to 50 hours of operation. This practice helps in more even wear of the plugs, as the top plugs tend to scavenge better than the bottom ones. Proper adjustment of the idle speed, typically between 600 to 650 RPM, along with maintaining a correct fuel mixture and induction air system, is essential for smooth engine operation and preventing excessively rich fuel/air mixtures at idle speeds. Such conditions can lead to spark plug fouling and decreased performance. Regular inspection of spark plugs should involve checking the electrodes for signs of wear, damage, or deposits. Any plugs found to be defective or outside of the manufacturer’s specifications should be replaced with approved spark plugs as listed in the latest revision of Service Instruction No. 1042. By following these guidelines, operators can ensure the efficient and safe operation of their Lycoming engines and also prolong the lifespan of their spark plugs.

Consequences of Using Unapproved Spark Plugs

Using spark plugs that are not approved by Lycoming, as detailed in Service Instruction No. 1042, can lead to severe consequences for the engine. A primary issue is the potential for significant engine damage. Engines are designed to operate with specific spark plug types, including considerations for reach and heat range. Installing an unapproved spark plug can result in improper combustion, leading to issues like pre-ignition or detonation, both of which can cause serious internal engine damage. For example, using a long reach spark plug in an engine designed for a short reach plug will cause damage. This can also result in reduced engine performance, increased fuel consumption, and increased emissions. Unapproved spark plugs may not provide the required spark energy or may not properly dissipate heat, leading to engine misfires and rough running. Furthermore, the use of non-approved spark plugs can void any applicable engine warranties. Adherence to Service Instruction No. 1042 ensures that only tested and approved components are used, maintaining engine integrity and performance. It is important to note that using only approved spark plugs is critical for safety and maintaining the correct operation of Lycoming engines. Always refer to the latest revision of Service Instruction No. 1042 before replacing any spark plugs.

Related Lycoming Service Documents

Lycoming Service Instruction No. 1042 is part of a larger suite of documents that provide guidance on the maintenance and operation of Lycoming engines. Other related documents include Service Bulletins, Service Letters, and additional Service Instructions. These documents cover a wide range of topics, from specific repair procedures to new product introductions. For example, Service Instructions address modifications, processes, and other essential information for engine maintenance, repair, and overhaul. Service Letters explain service policies and introduce new products approved for Lycoming engines. Additionally, some Lycoming service documents are referenced in Airworthiness Directives, which are mandatory for aircraft safety. These additional documents often complement the information found in Service Instruction No. 1042, offering further insight into different aspects of engine care. It’s important to cross-reference the latest revisions of these documents to stay up-to-date with the most accurate information. Documents like Service Instruction No. 1009 address time between overhauls, while others may focus on specific components or systems. Understanding how these different service documents relate is key to maintaining Lycoming engines correctly. Furthermore, referencing these documents will ensure that all maintenance is carried out in accordance with Lycoming’s recommendations.

trader joe’s mini tacos instructions

Trader Joe’s Mini Tacos⁚ An Overview

Trader Joe’s offers a variety of frozen mini tacos‚ including both beef and chicken options. These small tacos are designed for quick preparation and serve as convenient appetizers or light meals. They are found in the frozen food section of Trader Joe’s stores.

Product Description

Trader Joe’s Mini Beef Tacos feature a savory beef filling encased in a crispy corn tortilla. These frozen mini tacos are intended for easy and quick preparation‚ making them a convenient snack or meal option. The beef filling is seasoned and flavorful‚ aiming to provide a satisfying taste experience. The small size makes them perfect for appetizers or light meals. They are designed to be cooked from frozen and offer a simple way to enjoy a classic taco flavor. The product aims to offer a quick solution for those craving a bite-sized Mexican-inspired dish without extensive cooking time. The mini tacos are sold in boxes of approximately 24-25 units‚ offering a good amount for sharing or individual consumption. The packaging is designed to be easy to store and open.

Trader Joe’s Mini Beef Tacos

Trader Joe’s Mini Beef Tacos are a popular frozen food item‚ offering a convenient and quick way to enjoy small‚ flavorful tacos. They are readily available in the freezer section.

Packaging and Quantity

Trader Joe’s Mini Beef Tacos come in a cardboard box‚ which you’ll find in the frozen food aisle. The packaging is designed to be easily opened‚ revealing the mini tacos inside. According to the packaging‚ each box contains approximately 24 tacos‚ though some boxes may have a few extra. One reviewer mentioned receiving 25 tacos in their box‚ indicating a potential for slight variations in quantity. The tacos are neatly arranged within the box‚ making it easy to access them for cooking. The packaging provides basic cooking instructions and nutritional information.

Cooking Methods for Mini Tacos

There are multiple ways to prepare Trader Joe’s mini tacos‚ including oven baking‚ air frying‚ and skillet cooking. Each method offers a different texture and preparation time.

Oven Instructions

To cook Trader Joe’s mini tacos in the oven‚ preheat it to 425 degrees Fahrenheit. Place the frozen tacos on a baking sheet‚ ensuring they are in a single layer. Bake them for approximately 6 to 8 minutes‚ or until the shells become crispy and heated through. Monitor the tacos closely to prevent burning. The baking time may vary slightly depending on your oven. Ensure the tacos are heated to an internal temperature of 165F. This method is preferred for achieving an even crispiness with minimal effort. Some recipes suggest a 20-minute bake time at 425 degrees.

Air Fryer Instructions

For air fryer preparation of Trader Joe’s mini tacos‚ preheat your air fryer to 375 degrees Fahrenheit. Place the frozen mini tacos in the air fryer basket‚ making sure they are arranged in a single layer to ensure even cooking. Cook for approximately 5 minutes‚ flipping them halfway through the cooking time to achieve uniform crispiness. Ensure the internal temperature reaches 165F. Some users have found that 7 minutes at 370F works well. The air fryer method provides a quicker way to get crispy shells. Always follow specific manufacturer recommendations for your air fryer model.

Skillet Instructions

To cook Trader Joe’s mini tacos in a skillet‚ begin by heating a small amount of oil‚ about 1/4 of an inch‚ in a pan over medium heat until it reaches approximately 350 degrees Fahrenheit. Carefully place the frozen mini tacos into the hot skillet‚ ensuring they are in a single layer. Cook the tacos for about 1 to 2 minutes on each side‚ or until the shells are golden brown and crispy. Allow the tacos to rest on paper towels for a couple of minutes to remove excess oil. This method is quick and provides a good texture.

Trader Joe’s Mini Chicken Tacos

Trader Joe’s also offers mini chicken tacos‚ featuring white meat chicken‚ cheese‚ and roasted corn salsa in a crispy corn tortilla. These are designed as quick appetizers or light meal options.

Preparation Suggestions

For the mini chicken tacos‚ preheating your oven to the recommended temperature is the first step. If you’re using chicken breasts separately‚ slicing them in half if they are thick will ensure even cooking; baking them at 400 degrees for 20 minutes will work well. Ensure that the chicken reaches an internal temperature of 165 degrees. When preparing the mini tacos‚ if the surface appears dry‚ consider adding a light coating of oil or cooking spray to enhance crispiness. These tacos are incredibly easy to prepare‚ making them ideal for quick meals or as appetizers when you have guests over.

Flavor and Texture

The mini tacos feature a crispy corn tortilla shell and a filling of either seasoned beef or white meat chicken‚ often combined with cheese and sometimes roasted corn salsa. The texture is designed to be enjoyable.

Filling and Shell

The filling of Trader Joe’s mini tacos varies depending on the variety‚ with the beef option featuring seasoned ground beef. The chicken version includes white meat chicken‚ often combined with roasted corn salsa and cheese. Both fillings are designed to provide a savory taste. The shell is made of corn tortilla‚ which crisps up when cooked according to instructions. It provides a crunchy contrast to the soft filling. The combination of textures and flavors is intended to make for a satisfying eating experience‚ whether served as a snack or part of a meal. The ingredients are pre-cooked and frozen‚ making them convenient for quick preparation.

Serving Ideas

Trader Joe’s mini tacos are versatile and can be enjoyed with various condiments and sauces. They are great as appetizers‚ light meals‚ or as part of a larger taco board with other toppings.

Condiments and Sauces

When serving Trader Joe’s mini tacos‚ a variety of condiments and sauces can enhance the flavor profile. Many people enjoy these mini tacos with multiple dips‚ pulling out various options from their refrigerator. Consider adding some sour cream or Greek yogurt for a creamy element. A vibrant salsa‚ such as Trader Joe’s own options‚ can provide a fresh and spicy kick. Hot sauce enthusiasts might want to explore different varieties‚ from mild to fiery. A simple guacamole or avocado crema can add richness and coolness. Finally‚ consider a jalapeño cream sauce to offer a unique flavor and a bit of heat‚ complementing the savory filling of the tacos. These additions make for a more exciting eating experience.

Customer Reviews and Feedback

Customer feedback on Trader Joe’s mini tacos is mixed‚ with some praising their convenience and taste‚ while others express disappointment with the filling and texture. Some also remember the old recipe fondly.

Positive Feedback

Many customers appreciate the convenience of Trader Joe’s mini tacos‚ noting that they are a quick and easy option for appetizers or a light meal. The ability to cook them in an air fryer‚ oven‚ or skillet is seen as a plus‚ offering versatility in preparation. Some reviewers find the taste enjoyable‚ especially when paired with various condiments and sauces. The crispy shell is often highlighted as a desirable feature. They are also praised for being a good snack option for various occasions. Some customers find them perfect for parties‚ or as an after school snack. The small size is considered ideal for portion control and quick consumption.

Negative Feedback

Some customers find Trader Joe’s mini tacos to be somewhat bland and lacking in flavor. The filling is sometimes criticized as being underwhelming and not very satisfying on its own‚ often needing additional ingredients or sauces to enhance the taste. There are complaints about the texture‚ with some finding the shells to be too soft or not crispy enough when cooked according to package instructions. Some reviewers feel the tacos are not as good as the previous version. Others note that the filling can be sparse‚ and they are not very filling. The overall quality is sometimes described as average‚ with some customers saying they would prefer other options.

Comparison to Other Products

When compared to other Mexican-style items at Trader Joe’s‚ such as the birria‚ the mini tacos are considered a less impressive option. Customers suggest opting for the birria if seeking a more flavorful experience.

Trader Joe’s Birria

While the mini tacos are a convenient and quick snack‚ Trader Joe’s Birria is often recommended as a superior alternative for those seeking a more authentic and flavorful Mexican dish. The birria‚ which is a slow-cooked meat stew‚ offers a richer and more satisfying experience than the mini tacos. It requires more preparation but is considered worth the effort for a higher quality taco experience. Many customers suggest that if you’re looking for truly good tacos‚ the birria is the way to go‚ emphasizing a “do it yourself” approach for the best results‚ rather than relying on pre-made options like the mini tacos.

mobi dual scan thermometer instructions

The Mobi Dual Scan thermometer is a versatile device designed for accurate and efficient temperature measurement. It utilizes advanced infrared technology, providing quick scans for both ear and forehead readings. This thermometer also features the capability to measure food and object temperatures, making it a handy tool for various uses.

Overview of the Mobi DualScan Thermometer

The Mobi DualScan thermometer is a user-friendly device designed for quick and accurate temperature readings. It employs infrared technology, enabling both ear and forehead temperature measurements with ease. This dual functionality makes it a versatile tool for families and individuals. Its single-button operation ensures simplicity, allowing for quick scans without the need for technical manuals. The device also boasts a memory recall feature, storing previous readings for easy tracking. Furthermore, the illuminated display provides clear visibility of measurements, even in low-light conditions. The Mobi DualScan goes beyond body temperature, offering the ability to measure the temperature of objects and food, enhancing its practicality. The thermometer is designed for reliability, providing the accuracy that people expect from MOBI products, making it a dependable addition to any home.

Key Features and Functionality

This thermometer offers dual measurement modes, allowing readings from the ear or forehead. It also features single-button operation for quick scans, memory recall, and an illuminated display for easy use;

Dual Measurement Modes⁚ Ear and Forehead

The Mobi Dual Scan thermometer provides the convenience of dual measurement modes, allowing users to take temperatures from either the ear or the forehead. This flexibility makes it suitable for various age groups and situations. For ear measurements, the device is designed to be gently placed inside the ear canal, ensuring an accurate reading. When using the forehead mode, the thermometer is held near the forehead, providing a non-invasive method of temperature taking. The device automatically switches between modes, making it user-friendly. This dual functionality makes the thermometer a versatile tool for monitoring temperature in a variety of settings, from newborn care to adult use. The option to choose between ear and forehead measurements adds an extra layer of convenience for users who may have preferences or limitations.

Single Button Operation for Quick Scans

The Mobi Dual Scan thermometer is designed with user convenience in mind, featuring a single-button operation that allows for quick and easy temperature scans. This simplified design eliminates the need for complicated settings or multiple buttons, making the device very straightforward to use. The scan button is used to turn on the thermometer and initiate the measurement process. A simple press and release of the button is all that is needed to obtain a temperature reading, whether it is from the ear or forehead. This single-button functionality is particularly beneficial for quick temperature checks, especially with children or in situations where time is limited. The intuitive design ensures that users of all ages can operate the device without difficulty, providing fast and reliable temperature measurements with minimal effort. No technical manuals are needed for this.

Memory Recall of Previous Readings

The Mobi Dual Scan thermometer includes a helpful memory recall feature, allowing users to easily track previous temperature readings. This functionality enables users to review up to 9 previous measurements, providing a convenient way to monitor temperature trends over time. This feature is particularly useful for individuals who need to keep track of their temperature fluctuations, such as during an illness. By having past readings readily accessible, users can better observe changes and make informed decisions about their health. The memory recall function eliminates the need to manually record each temperature, making the process more efficient and user-friendly. This feature ensures that users can easily monitor temperature differences, providing valuable insights into their health status without extra effort. The memory function adds to the overall convenience of the thermometer.

Illuminated Display for Easy Reading

The Mobi Dual Scan thermometer is equipped with an illuminated display, designed to ensure clear and easy reading of temperature measurements in various lighting conditions. The display provides large, easily readable digits, making it simple for users of all ages to see their results. This feature is particularly beneficial in dimly lit environments or during nighttime checks, eliminating the need for additional light sources. The illuminated display also shows essential information such as battery life and the current time, ensuring users are always aware of the device’s status. The clear and bright display enhances the overall user experience, allowing for quick and accurate readings without any difficulty. This feature is especially convenient for parents monitoring children’s temperatures at night. The illuminated design is a key component of the Mobi Dual Scan’s user-friendly interface. The display ensures the thermometer is easy to operate in any setting.

Operating Instructions

To effectively use the Mobi Dual Scan thermometer, it’s essential to understand its basic operation. This section will guide you through turning the device on and taking accurate temperature measurements using both ear and forehead modes.

Turning the Thermometer On

Initiating the Mobi Dual Scan thermometer is a straightforward process designed for ease of use. To begin, locate the “SCAN” button on the device; this is typically the primary button used for most functions. Press this button firmly and release it. Upon a successful activation, the thermometer’s display will illuminate, indicating that the unit is now powered on and ready for operation. A brief self-test may also occur, which is normal. The display will show an icon to indicate which mode the thermometer is in by default (usually the ear mode). The device is now prepared to take measurements; ensure the probe cover is attached if using the forehead mode, or remove it before taking an ear measurement, according to your desired mode. The thermometer is designed for immediate use after being switched on, with no extensive setup required.

Taking Ear Temperature Measurements

To accurately measure ear temperature with the Mobi Dual Scan thermometer, begin by ensuring the probe cover is removed. The device will likely default to ear mode upon powering on, indicated by the ear icon on the display; if not, select it. Gently insert the thermometer’s probe into the ear canal, ensuring it is positioned correctly for an accurate reading. Once the probe is comfortably placed, press and hold the “SCAN” button for approximately one second, then release. A short beep sound will indicate that the measurement is complete and the temperature will be displayed on the screen, either in Fahrenheit or Celsius depending on your setting. Avoid moving the thermometer during the measurement process, as this can affect accuracy. The temperature reading will remain on the screen for a brief period, allowing for easy recording.

Taking Forehead Temperature Measurements

To use the Mobi Dual Scan thermometer for forehead temperature readings, ensure the probe cover is attached. Power on the device and if necessary, switch to forehead mode, indicated by the forehead symbol on the display. Position the thermometer approximately one inch away from the center of the forehead. Press and release the “SCAN” button to initiate the measurement. The device will quickly scan the forehead area, and a short beep sound will signify the completion of the measurement. The temperature reading will then be displayed on the screen in either Fahrenheit or Celsius, as per the current settings. It’s essential to maintain a steady distance during the scanning process and avoid any movement that may disrupt the reading. The displayed temperature will remain visible for a few seconds.

Measuring Food and Object Temperatures

The Mobi Dual Scan thermometer is not only for body temperature, it can also be used to measure the temperature of food and other objects. To do this, ensure the thermometer is in the correct mode; this may be indicated by a symbol on the display or no symbol at all. Hold the device approximately one inch away from the surface of the food or object you wish to measure. Press the “SCAN” button to initiate the measurement, aiming the sensor at the target. Once the scan is complete, the thermometer will emit a short beep, and the temperature reading will appear on the display. Remember, the temperature shown will be in Fahrenheit or Celsius, depending on your chosen settings. Maintain a steady position during the scan to ensure accurate readings, avoiding any movement that could affect the results.

Troubleshooting and FAQs

This section addresses common issues, such as the “HI” error, which often indicates a temperature reading outside the device’s range. It also covers battery life and replacement procedures, ensuring smooth operation of the thermometer.

Addressing Common Issues like “HI” Error

The “HI” error on your Mobi Dual Scan thermometer typically indicates that the measured temperature is above the device’s upper limit. This can occur when attempting to measure an object or person with a very high temperature. First, ensure the thermometer is in the correct mode—human mode for body temperature. If using the forehead mode, make sure the sensor is clean and not obstructed. If the error persists, try taking a reading in the ear mode to see if the results are different. If you still get the “HI” reading, it could suggest that the thermometer is either faulty or the temperature being measured is genuinely too high. Always consult a medical professional if you suspect a fever. Check the battery level, as low power can also cause erratic readings, and consider replacing the batteries with fresh ones to rule out a battery issue. Ensure you are holding the thermometer correctly and within the specified distance, if applicable, for accurate measurements. If none of these steps resolve the issue, consult the user manual or contact customer support for further assistance.

Understanding Battery Life and Replacement

The Mobi Dual Scan thermometer is powered by batteries, and understanding their lifespan and how to replace them is crucial for continuous operation. Battery life varies based on usage, but generally, a set of new batteries should last for numerous measurements. The thermometer’s display will indicate when the battery is low; usually, a battery symbol will appear. When you see this, it’s time to replace the batteries. Typically, the thermometer uses AAA batteries. To replace them, locate the battery compartment on the device, usually on the back or bottom. Open the compartment using a small screwdriver or by sliding a cover, then remove the old batteries and insert the new ones, making sure to match the correct polarity (+ and -). Close the battery compartment securely. After battery replacement, test the device to make sure it’s working properly. If issues persist, consult the user manual.